8 Tips for Ensuring Your Gear Is Ready for An Expedition
Spending time outdoors is one of the best ways to relax and reset, until something on your gear gives out. Maybe your jacket tears on a branch, a tent pole breaks, or a seam starts leaking. It’s frustrating, but it doesn’t have to ruin your trip.
Most of the time, these kinds of problems can be sorted quickly if you’re ready for them. A small repair kit and a bit of know-how can go a long way. You’ll save time, avoid cutting your trip short, and probably save money too. A torn bit of fabric or a stuck zip shouldn’t mean replacing the whole thing.
Before you head off, especially if you’re going somewhere remote, take a few minutes to put together a simple repair kit. You can buy one, sure, but it’s just as easy to make your own that’s lighter and better suited to the gear you actually use.
Start by thinking about what you’re taking with you. Then imagine the most likely things that could go wrong. It doesn’t have to be extreme. Just think about normal wear and tear. Seams can fail, zips can jam, buckles can break, ropes might snap, and batteries definitely run out. If your kit covers the basics, you’ll be ready for pretty much anything.
What you should consider taking in your repair kit
- Small scissors or a blade
- Zip ties
- Waterproof tape (our customers strongly recommend TUFF Tape)
- A small sewing kit
- Spare cord
- Fast-curing contact adhesive (if you have space/spare weight)
Pre-Expedition Checklist
Before you set off, it’s worth taking the time to check over your gear thoroughly. Look for any signs of wear or damage that could become a problem once you’re out in the elements. A quick inspection now can save you from a much bigger hassle later on, especially when you’re miles from the nearest gear shop.
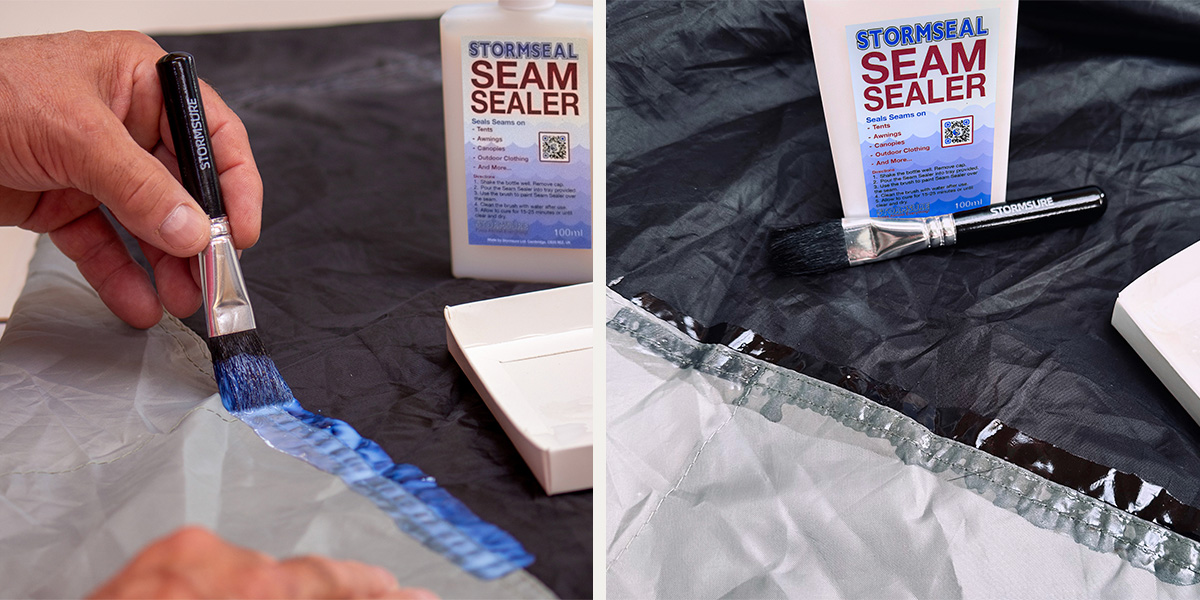
1. Inspect Tent Seams
Over time, tent seams become stressed, especially at folding points. Look closely for tiny holes or stretched stitching. Use a dedicated seam sealer like Stormseal Seam Sealer to waterproof from the inside. Stormseal dries in about 10 minutes and forms a flexible, hard-wearing seal that moves with the fabric, making it ideal for repeated folding and packing. Make sure it’s completely dry before you put your tent away.
2. Patch Groundsheet and Floor Damage
Even small holes or worn spots on your tent floor can lead to leaks. Use TUFF Tape self-adhesive tape to seal them up securely. It’s thin and flexible, so it sticks well even on creased or folded areas. TUFF Tape is just 285 microns thick, which makes it much better suited for this kind of repair than bulkier tapes like Tenacious Tape or Gorilla Tape that often lift at the edges or where they fold when the tent is packed up. A pack of round patches or a small strip that can be cut to size is recommended. Please note that when a tent outer is treated with silicone, it must be repaired with silicone tape or glue, as nothing else will stick to it well.
3. Test and Re-proof Waterproof Layers
Check your waterproof jackets, trousers, and outer tent fabric. If water no longer beads on the surface, it’s time to re-proof. Use a durable water repellent like Stormproof to restore performance.
Many of the most common durable water repellents are silicone-based repellents. These are harder to apply, reduce breathability, and make repairs more difficult because most adhesives will not stick to silicone. Stormproof is fluorocarbon-based but completely free from harmful PFAs. It is easy to apply, keeps fabric breathable, and protects against water, dirt, and oils.
4. Reinforce High-Wear Points
Check rucksacks, gaiters, boots, and poles for stress damage. Small tears in boot linings, fabric packs, or gaiters can be reinforced in advance using Stormsure Flexible Repair Adhesive or TUFF Tape. Apply in dry, clean conditions.
5. Replace Tired Tent Pegs and Ropes
Pegs and guy lines are easy to forget about after being packed away at the end of the last expedition, but can make the next very difficult. Check every peg for straightness and rope for fraying. Windy nights will exploit weak anchors. It’s always worth carrying a couple of spares with you too. We recommend marking them with reflective or bright tape for visibility in poor light.
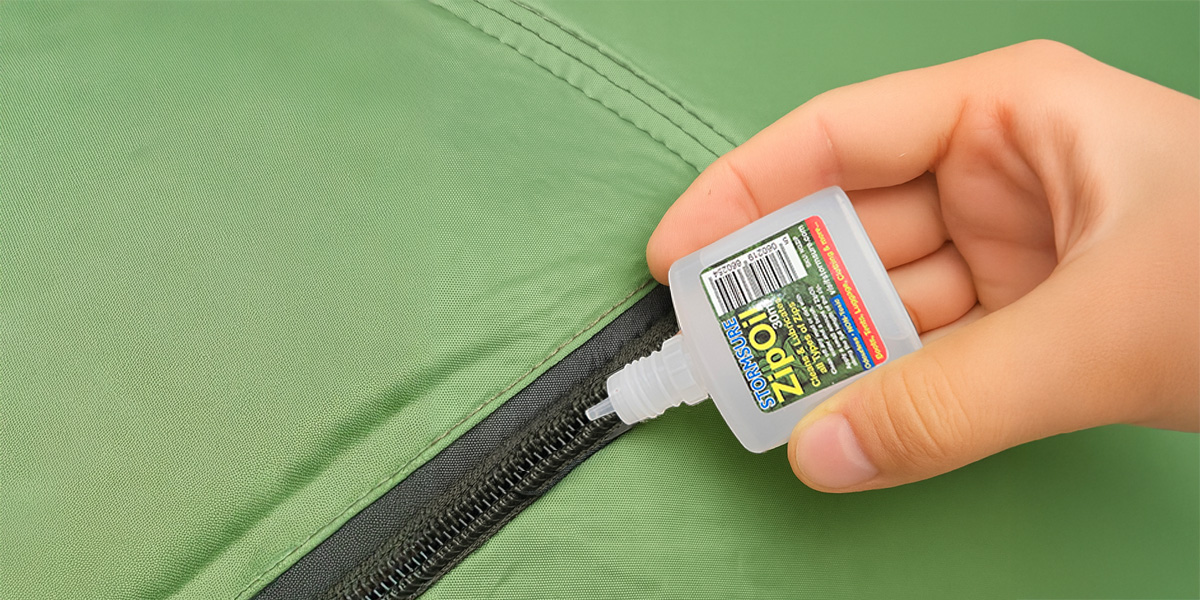
6. Check Zips and Fasteners
Use a lubricant or wax on all zips before you go. Replace damaged sliders or missing pulls. Pack a few safety pins or cable ties in case of unexpected breaks in the field. Stormsure’s Zip Oil is everything you need to keep your zips working as expected. A failed or corroded zip could ruin a whole expedition if proper care is not taken.
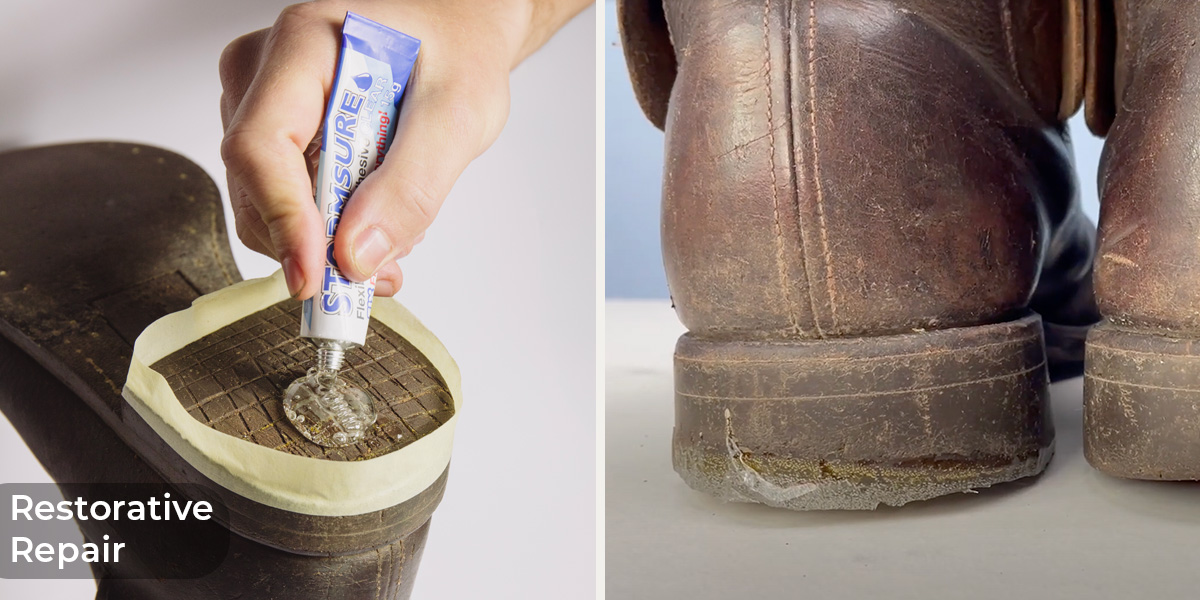
7. Reseal Footwear
Your hiking boots take the brunt of the expedition, so it’s crucial they’re in top shape. If you spot any cracks, worn seams, or small holes, apply Stormsure Flexible Repair Adhesive to seal them up. Once cured, it creates a waterproof, flexible, and incredibly durable bond that moves with the boot as you walk. For best results, allow a full 48 hours of curing time before wearing them again, especially if you expect your boots to face heavy use, wet conditions, or uneven terrain.
With Stormsure Flexible Repair Adhesive, you can repair completely broken parts of the shoe or even restore an imbalanced heel.
8. Pack a Compact Repair Kit
Even your most trusted pair of hiking boots will eventually wear out…hopefully not while you’re deep in the backcountry. If you spot cracks, holes, or separating soles before the trip, use Stormsure Flexible Repair Adhesive. It cures into a durable, flexible, and completely waterproof bond that moves with your boot, making it ideal for demanding conditions. For the best results, let it cure for 48 hours before you head out.
But what if the odds go against you and a boot starts to fail mid-expedition? A quick fix with TUFF Tape can hold things together until you’re back to base. Or, for a more permanent repair on the go, use a contact adhesive like Stormoprene Contact Adhesive. It bonds quickly, handles stress well, and the repair can be ready in just 15 minutes.
To learn how to repair and refresh your outdoor gear with Stormsure products, take a look at our video guides and Help articles, or follow us on Instagram and Facebook for more tips and ideas.